
How To setup eCommerce Store Quickly With Open-cart.2018

In This Tutorial i talked about my own personal Approach About eCommerce Development .
i would not recommend Open cart for the Big Enterprise Or more Highly complex Customized Store Requirement.
my intention is not cater you with All pros & cons of eCommerce Development whether it's based on magento or opencart .
i m in this post show you the way for fast execution for your small medium business eCommerce store with open cart .
let's start the steps.
step:1 How To install Open cart On Localhost / your server.
Go here Official Opencart package website And Download Opencart Latest Version.
Download Opencart Here : http://www.opencart.com

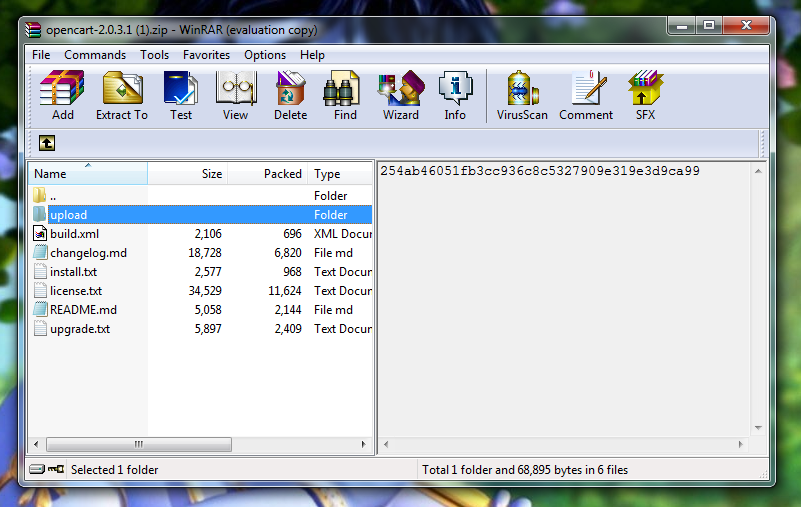
for Localhost Go to Your Xampp,Mamp,or Lamp htdocs Directory Folder And Extract & Move The Upload Folder from Your Opencart directory To htdocs Directory.
on your Hosting Account go to one click installer or go to public_html folder And
Move The Upload Directory Here. pull out all data Outside Of directory And delete the upload folder.
And Do some Following Fixes To avoid installation Errors.
1.Rename Upload Directory With Your Desired Shop name eg shop.
2.And In directory You Find Config-dist.php file Rename It with The config.php.
3.Go to Admin Folder and Repeat The Same as above.
4. Now we need To make database For Our Website Go to localhost/PhpMyAdmin On localhost & On host Go to mysql and make database what name You liked.
5.for start installation on localhost proceed localhost/shop and & For host go to Yourdomain.com.
6.you get installation screen press continue and press continue if error shows check above steps correctly.
7.third screen appears with the configuration form for local host add root for username if you dont have idea about that and leave password blank. add database name and add your opencart admin username and password. for host add your database name and username and password of database.

.
8. if everything is awesome you get next screen with store and admin notification with one warning of delete install directory. so go ahead delete install directory and login to admin panel.

9. congratulation you have done almost 85% Of installation.
10. now i recommend use free Default open cart theme & customized it or Buy From Theme forest.
11. i will recommend the Theme because We need to setup store quickly & easily.
12.i will suggest best rated trending journal theme which is multipurpose and easy to setup theme for your store. and one feature i like the most is it's comes with p rebuilt 10 Demo With Import option.

13. you get power of Demo content for building your store easily follow along with it
14. before buying theme i will recommend try & test it on localhost .
15. you can download test version here Test Theme Download
16.after Theme downloaded for installation extract the similar Version of open cart theme package and move all folder to your open-cart installed directory and allow overwrite and replace.
make sure go to Extension > Setting
and install journal 2 module. after then go to store tab and select journal theme .
Now After installation of theme Go to your admin panel dashboard by login.
then go to system > setting click On Edit Button.
Now You can see New Journal dashboard menu On dashboard.
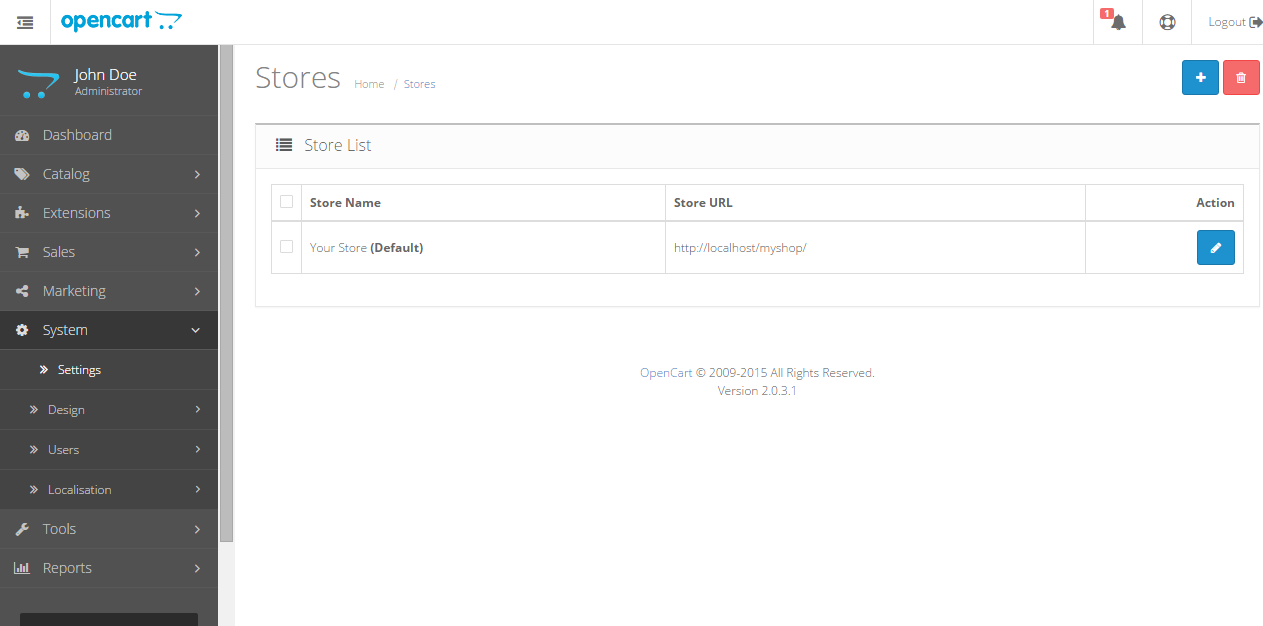
Click on General Tab To Fill-up The Store data.

Then Go To store Tab And go to template and choose Journal 2 and save. explore tabs for more.

Then Go Extension > Modifications and click on refresh.
Now The Final Step Of Your Theme Demo Installation.
Go To journal Tab > Setting >Active skins choose Your Demo skin.

Now Go To journal Tab > Setting > Scroll and Go to Import Export.
Go to Your Theme Download Folder And Extract Demo Data and Choose your Demo data for import. after choose File Click on Second backup/Restore Button.

Then Go Extension > Modifications and click on refresh.
now Go to Your Store And check Out The store looks as similar to demo of themes.
Now After Installing Demo You are Redy To go for adding Your Products.
before adding products remove all categories , products, and attributes from demo store.
login in admin panel go to catalog products and check all and delete it same do for category & attributes as well. that way you get good start.
Add Your Category First Then add Products So easily You can relate Product while inserting product with fallen category.

after your finished your store with product , payment , seo .
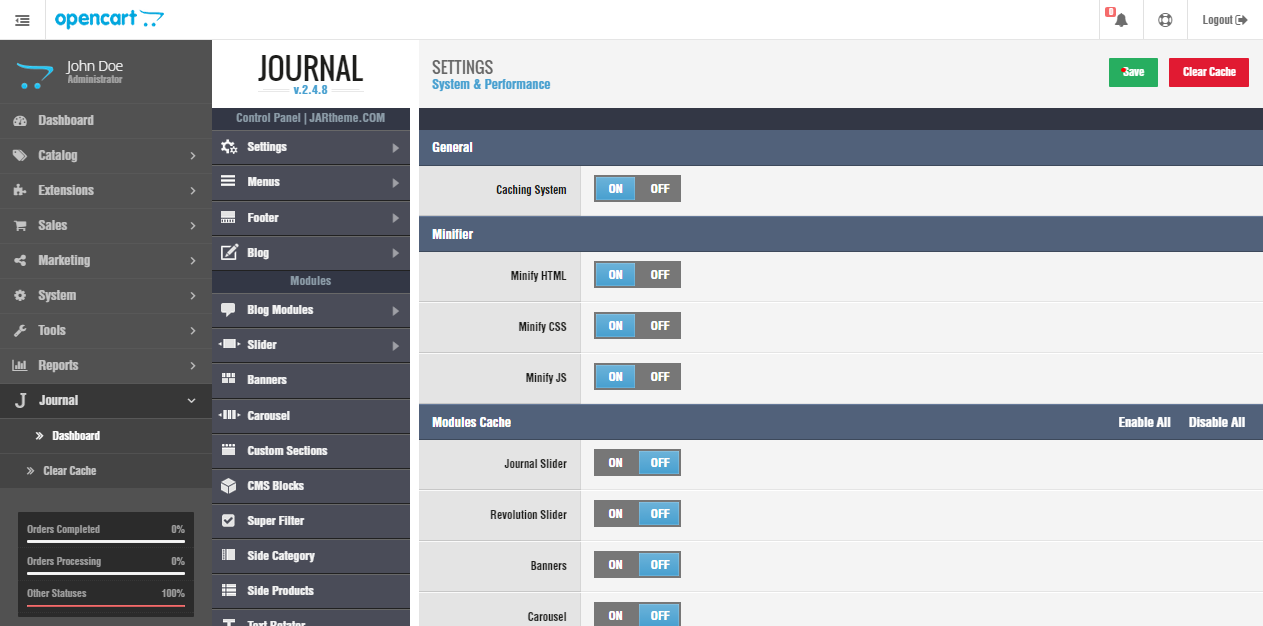
go to journal tab > setting > System & Performance
and Enable Caching System .Minifier & Modules Cache For Faster Performance & Load time.
i already purchased this theme for my business. and i used demo 8 for ladooshadoo.
and for more Information go to documentation of journal theme.
if you like it this open cart theme .please buy and support the author.

Thank you For Reading .
If you like It please share & spread the word.


